Game-ified arduino prototype
01Overview
Background
This is just a fun final project for a physical computing class in the last couple weeks of my senior year of college. What's a better way to celebrate graduating than a cold beverage with friends!
Friends in question...

02Idea
Design Question
What if there was an interactive game that tracks how long it takes my friends to chug a beverage and display their performance?
03Build
Game development
Bill of Materials
Schematic
 Circuit Schematic
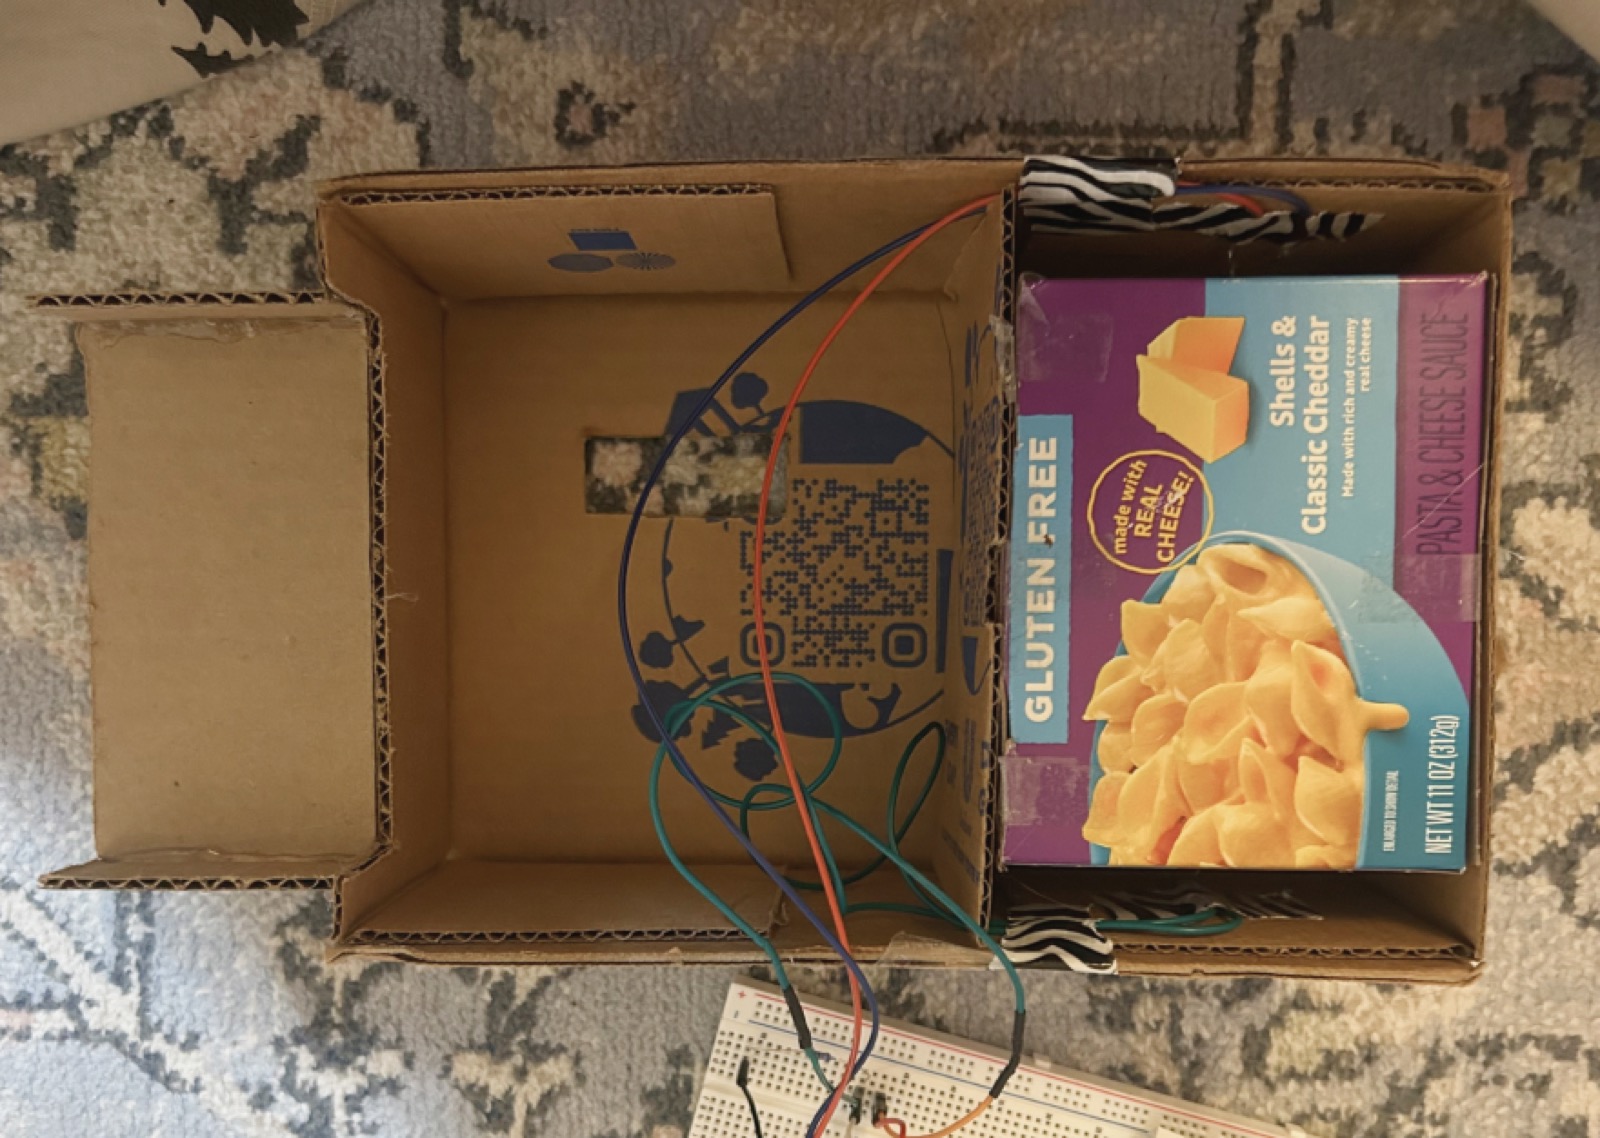
The power of a photoresistor
Problem
I needed to track whether a beverage was present in game to start, stop, and track the user's performance. Variables like weight or distance would have to be calibrated before each use, halting the flow of the game.
Solution
I used a photoresistor (a passive semiconductor component whose resistance decreases as light intensity increases) to measure whether or not the beverage was present. Using a LED light and a photoresistor inside the box, I created a controlled environment where the beverage acted as a gate. When removed, the direct LED light across from the sensor triggers the start/stop of the game.
no can enviroment = game on
present can enviroment = game off
Build Documentation
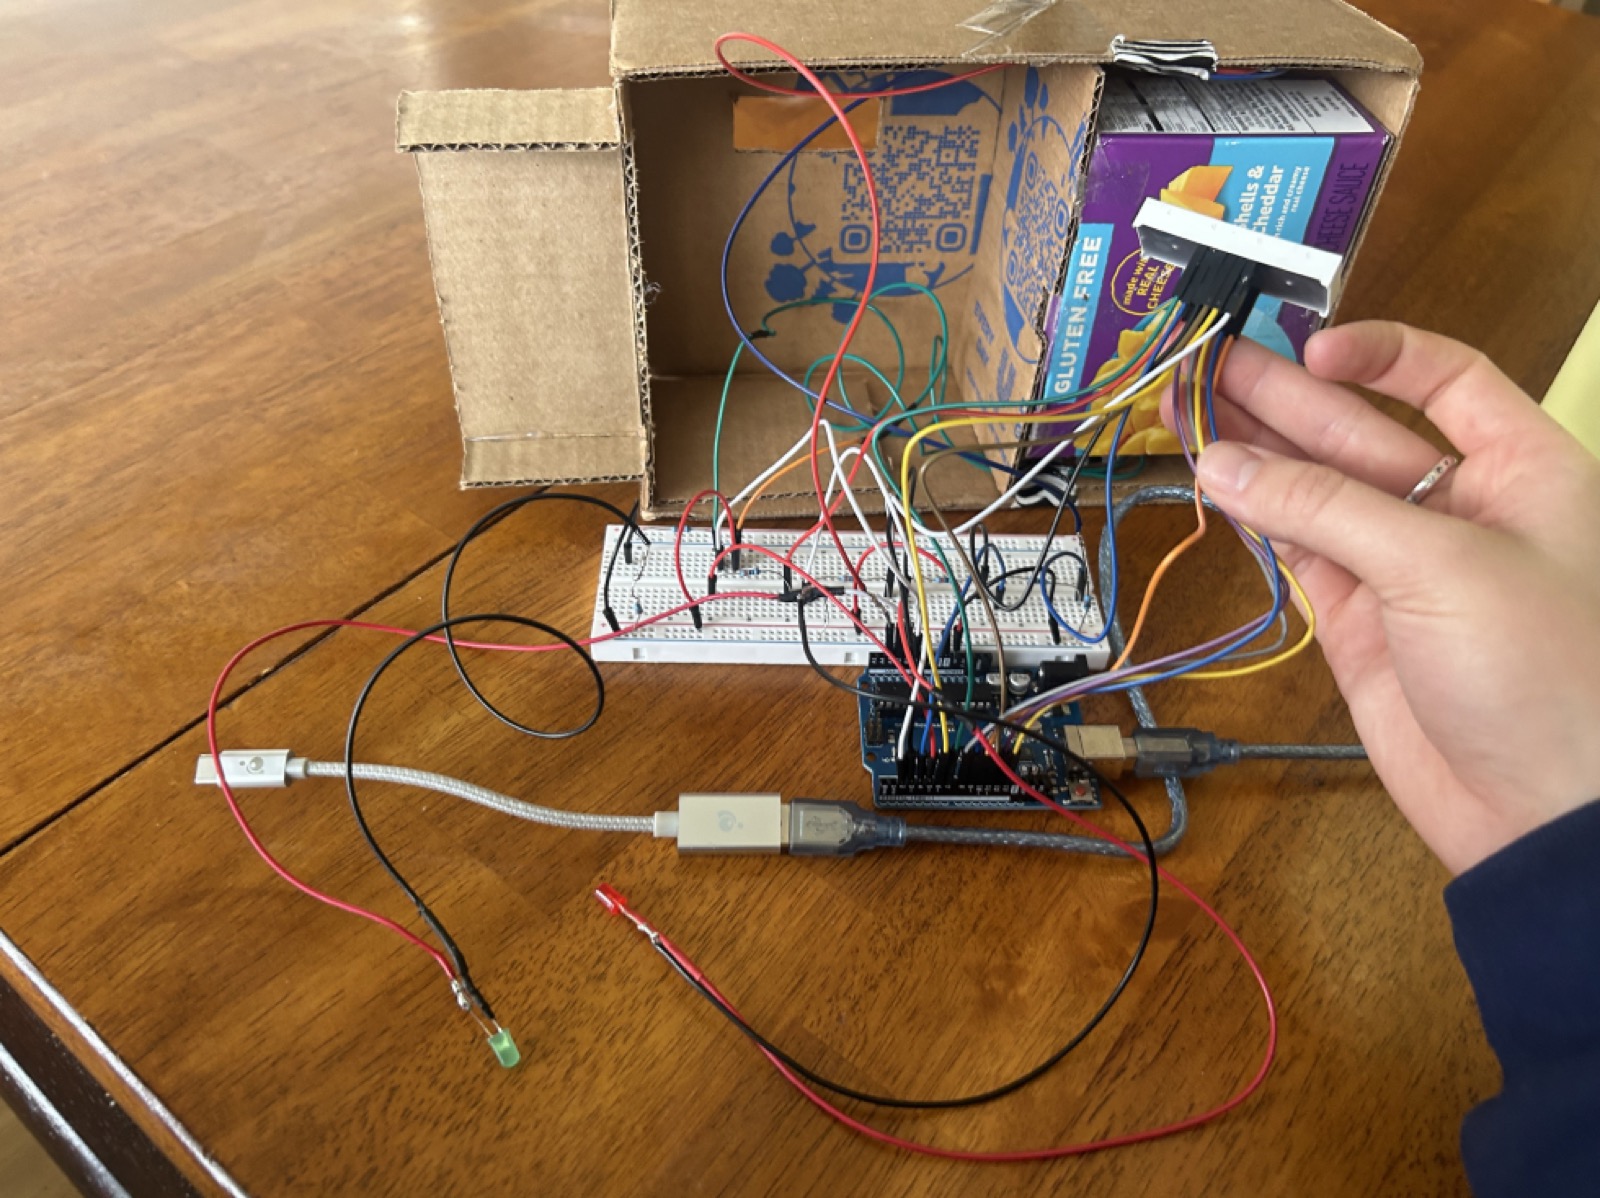
Technical Implementation
Using many booleans and different functions to map the game's status, I built a prototype and wrote the code to execute this game.
// Arduino C++ - full game implementation
#include <SevSeg.h>  // Include the SevSeg library

SevSeg sevseg; // Define a seven-segment display

int sensorLED = A3;  // Sensor LED pin (Red LED)
int greenLED = A1;  // Green LED pin
int redLED = A2;    // Red LED pin
const int sensorPin = A0; // Photoresistor sensor pin

const long lightThreshold = 150;  // Adjusted light threshold from serial monitor
bool lastCanState = false;  // Track the previous can state
bool gameRunning = false; // Tracks whether the game is running
bool gameFinished = false; // Prevents immediate restart after finishing

// Assign variables
unsigned long startTime = 0;
unsigned long elapsedTime = 0;
unsigned long displayStartTime = 0;

void setup() {
  Serial.begin(9600);

  // 7-segment display setup from Github
  byte numDigits = 4;
  byte digitPins[] = {2, 3, 4, 5};
  byte segmentPins[] = {6, 7, 8, 9, 10, 11, 12, 13};
  bool resistorsOnSegments = false;
  byte hardwareConfig = COMMON_CATHODE;
  bool updateWithDelays = false;
  bool leadingZeros = false;
  bool disableDecPoint = false;

  sevseg.begin(hardwareConfig, numDigits, digitPins, segmentPins,
    resistorsOnSegments, updateWithDelays, leadingZeros, disableDecPoint);
  sevseg.setBrightness(80);

  // Initialize LEDs as outputs
  pinMode(greenLED, OUTPUT);
  pinMode(redLED, OUTPUT);
  pinMode(sensorLED, OUTPUT);

  digitalWrite(redLED, HIGH); // Initially start with red LED on
  sevseg.setChars("bEEr"); // Initial intro on display
}

void loop() {
  digitalWrite(sensorLED, HIGH);
  long sensorValue = analogRead(sensorPin);

  // If sensor value < threshold (dark inside box) the can is on
  bool canOn = (sensorValue < lightThreshold);

  // Detect when can is lifted - start the game
  if (lastCanState && !canOn && !gameRunning && !gameFinished) {
    startGame();
  }

  // Detect when can is back - stop the game
  if (!lastCanState && canOn && gameRunning) {
    stopGame();
  }

  lastCanState = canOn;

  // Update timer display while game is running
  if (gameRunning) {
    unsigned long currentTime = millis();
    elapsedTime = (currentTime - startTime) / 100;
    sevseg.setNumber(elapsedTime, 1);
  }

  // After 5 seconds show end-game message and reset
  if (!gameRunning && displayStartTime > 0 && millis() - displayStartTime > 5000) {
    finishSequence();
    sevseg.setNumber(0, 1);
    displayStartTime = 0;
    gameFinished = false;
  }

  sevseg.refreshDisplay();
}

// Function to start countdown and begin timing
void startGame() {
  gameFinished = false;
  countdownSequence();
  digitalWrite(greenLED, HIGH);
  digitalWrite(redLED, LOW);
  startTime = millis();
  gameRunning = true;
}

// Function to stop timer and display end-game result
void stopGame() {
  gameRunning = false;
  displayStartTime = millis();
  gameFinished = true;
  digitalWrite(greenLED, LOW);
  digitalWrite(redLED, HIGH);
  sevseg.setNumber(elapsedTime, 1);
}

// Function that runs the countdown sequence
void countdownSequence() {
  int countdown = 3;
  for (countdown; countdown >= 0; countdown--) {
    if (countdown > 0) {
      sevseg.setNumber(countdown);
    } else {
      sevseg.setChars("GO");
    }
    unsigned long startMillis = millis();
    while (millis() - startMillis < 1000) {
      sevseg.refreshDisplay();
    }
  }
}

// Function displayed after the game is finished
void finishSequence() {
  unsigned long finishStartTime = millis();

  if (elapsedTime < 300) {
    sevseg.setChars("rAd.");  // Less than 30 seconds
  } else if (elapsedTime < 600) {
    sevseg.setChars("Good."); // Less than 60 seconds
  } else {
    sevseg.setChars("EH.");   // More than 1 minute
  }

  while (millis() - finishStartTime < 3000) {
    sevseg.refreshDisplay();
  }
}
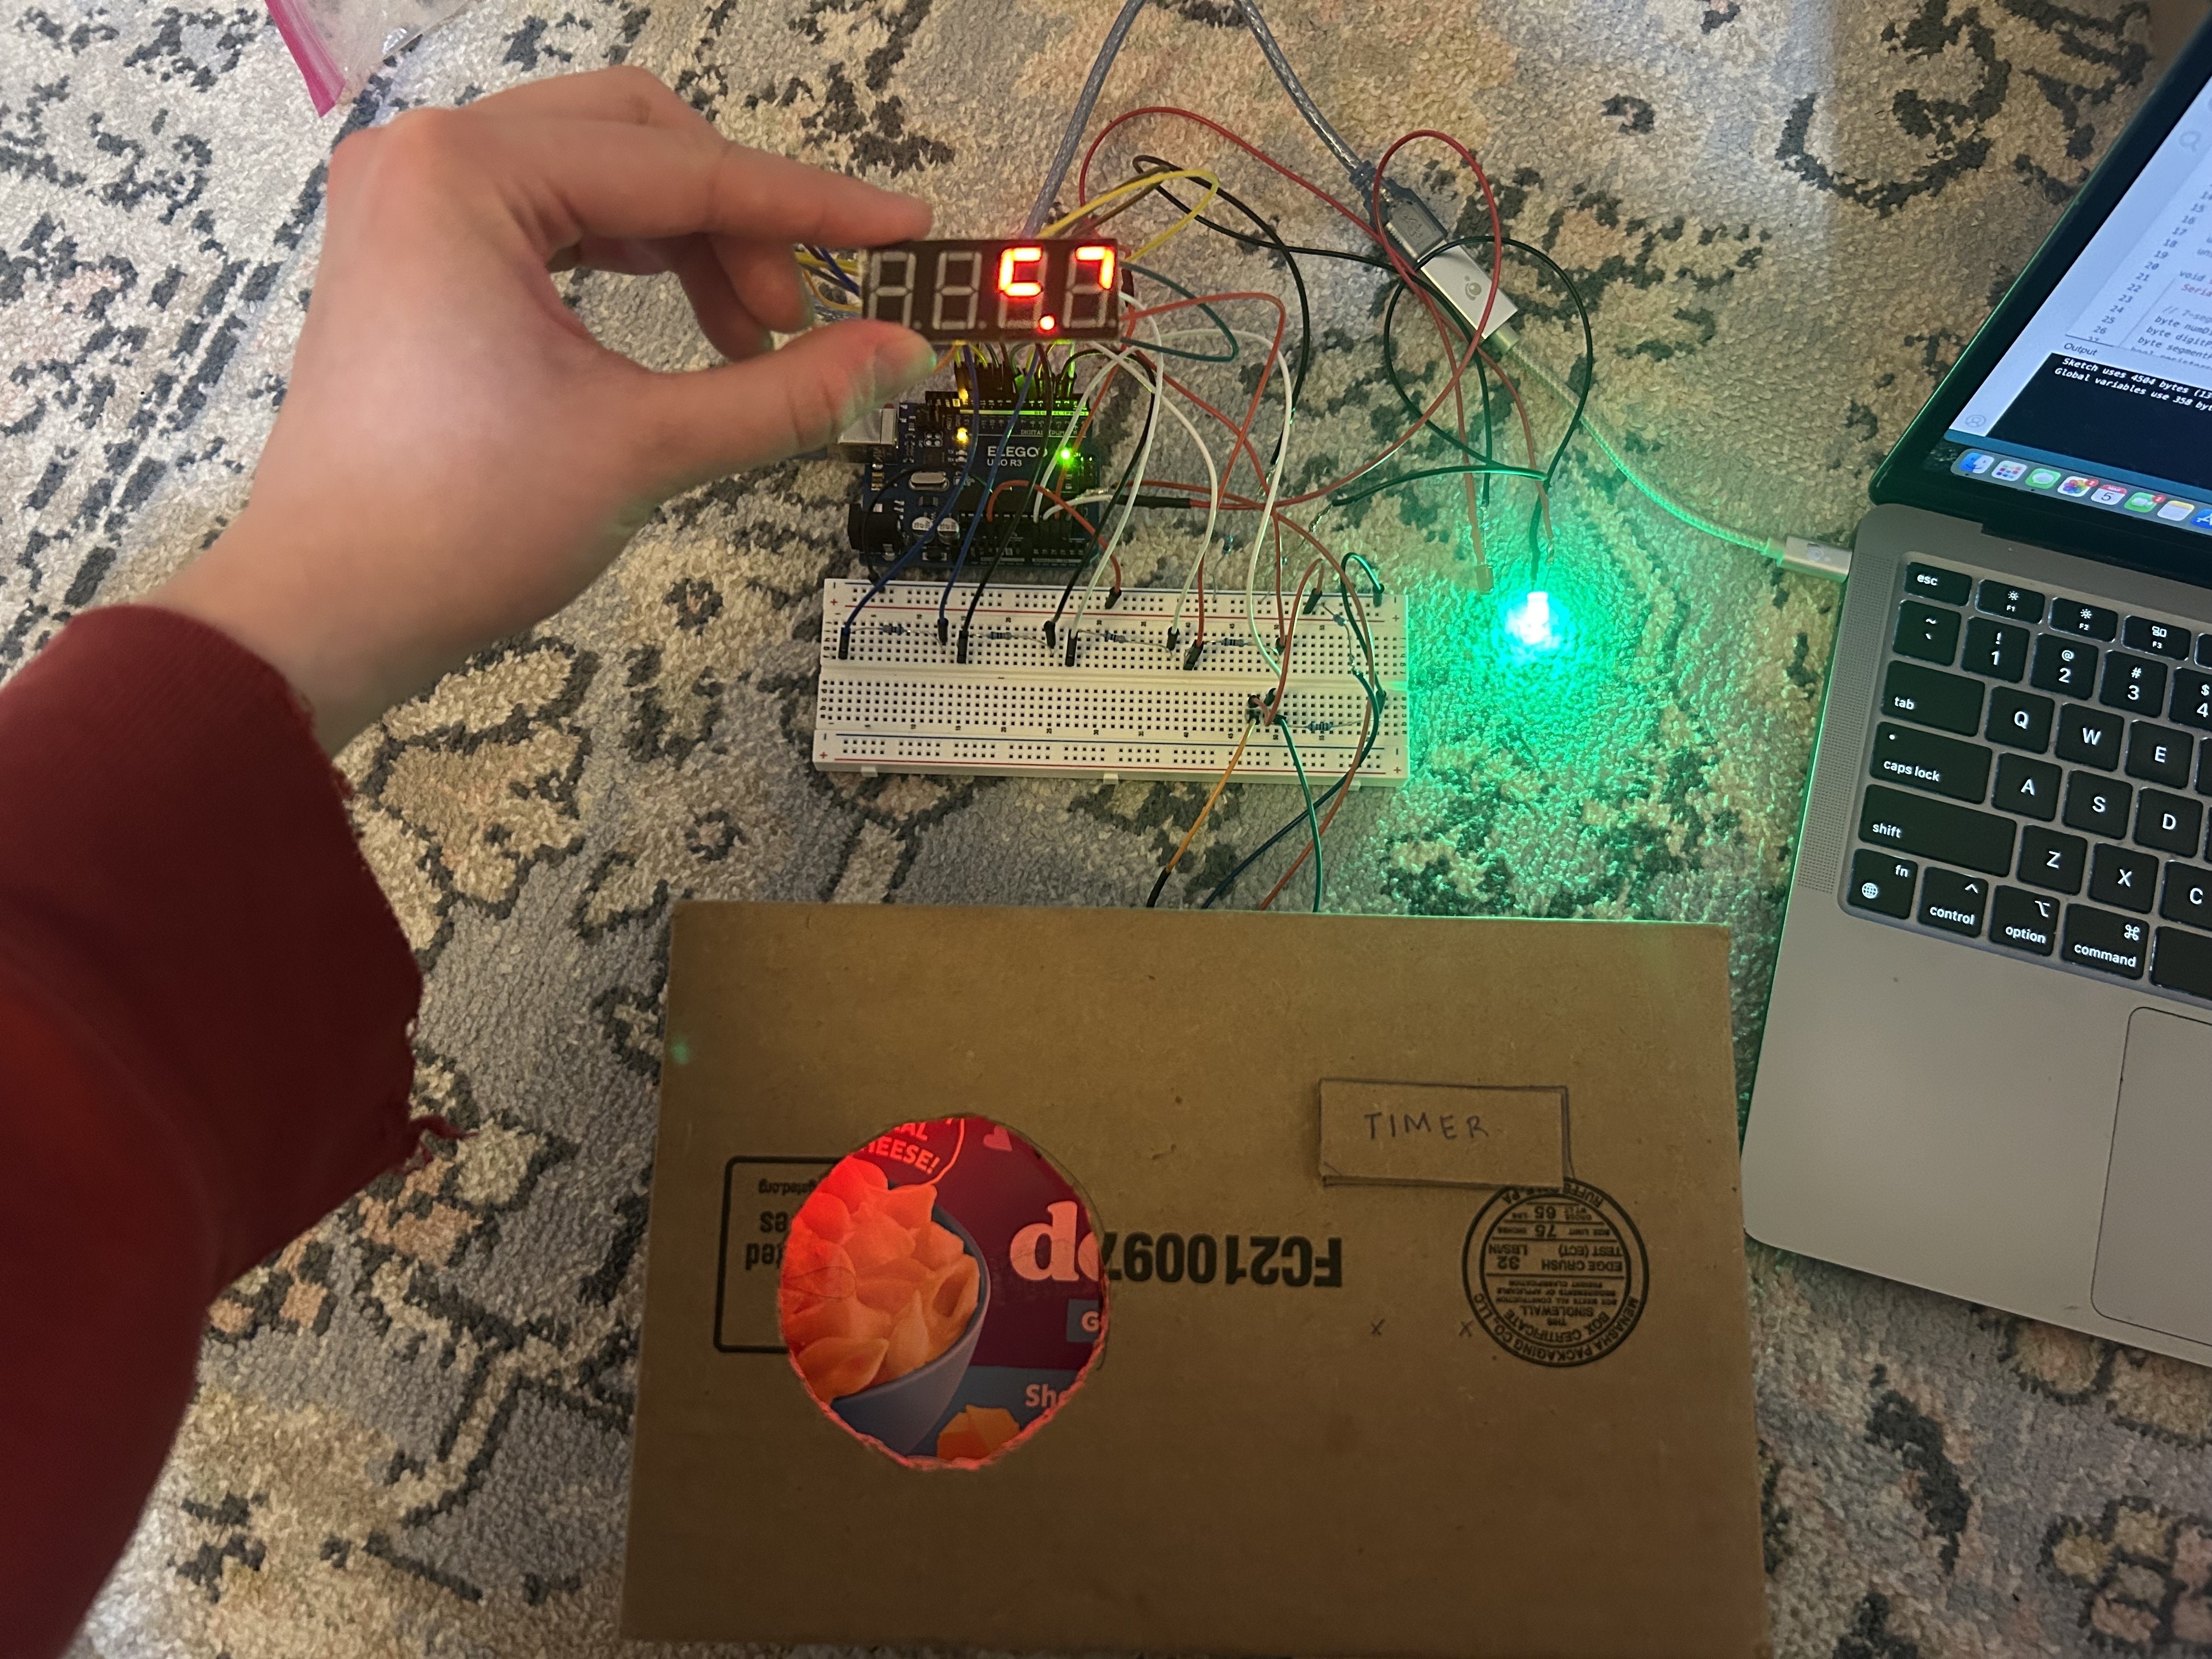
04Final Product
Chugging in action
Demo
05Reflection
I can't chug well
This was such a fun project because it bridged hardware and software using basic (and affordable) circuit components. It pushed me to consider how uncontrolled variables such as sensor calibration and human feedback shape the user experience. Building this game also reinforced the importance of rapid prototyping and experimentation in designing playful, human-centered systems.